> ## Documentation Index
> Fetch the complete documentation index at: https://support.visualcare.com.au/llms.txt
> Use this file to discover all available pages before exploring further.
# Checklists
> Create client checklists that flow through to Vworker shifts for workers to complete
Client checklists are task lists added to shifts when rostering. They flow through to the Vworker mobile app for workers to complete during their shift.
 ## Creating a new checklist
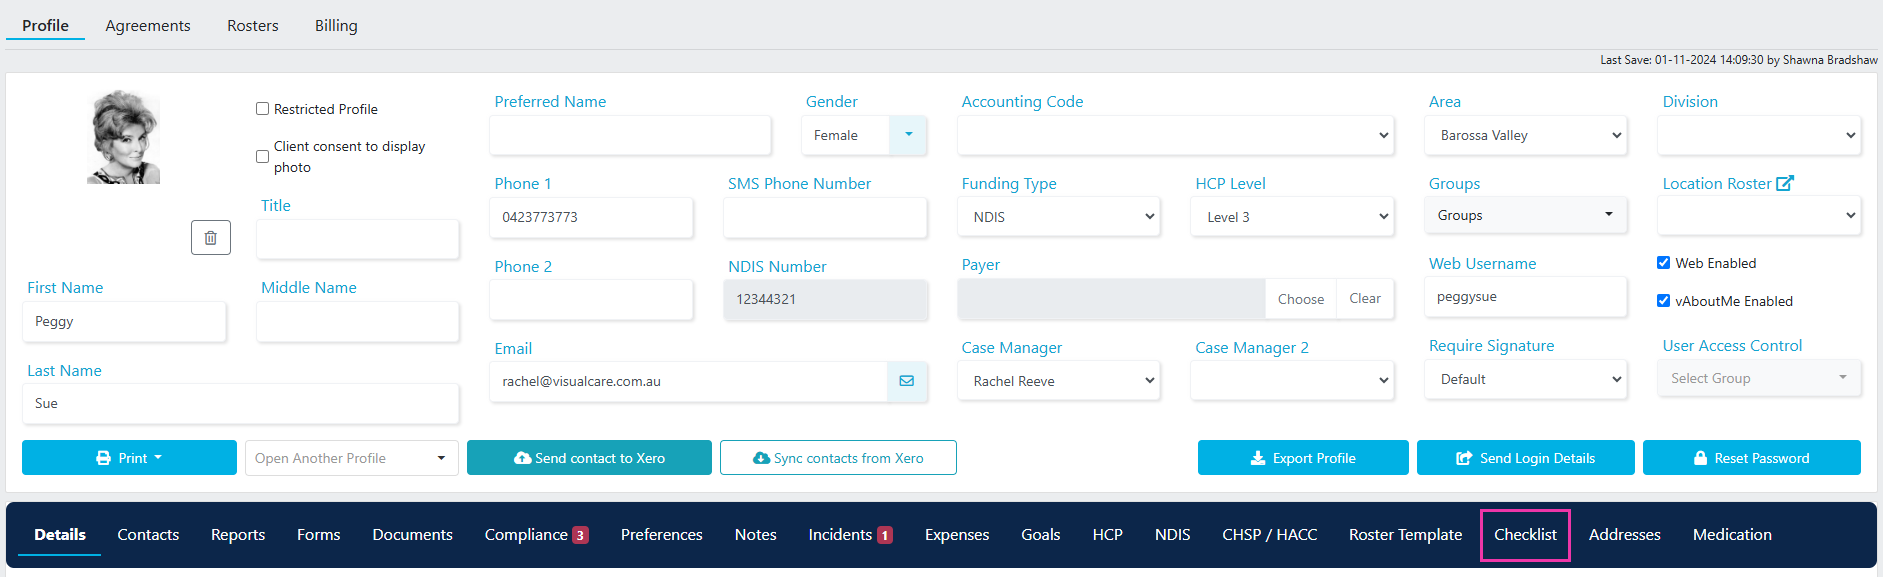
Navigate to **Client Profile** → **Checklist** tab.
Click **New Checklist**. Enter the checklist name and first item name.
Click **Add Additional Item** for each extra item you need on the checklist.
Once all items are added, click **Create Checklist**.
## Creating a new checklist
Navigate to **Client Profile** → **Checklist** tab.
Click **New Checklist**. Enter the checklist name and first item name.
Click **Add Additional Item** for each extra item you need on the checklist.
Once all items are added, click **Create Checklist**.
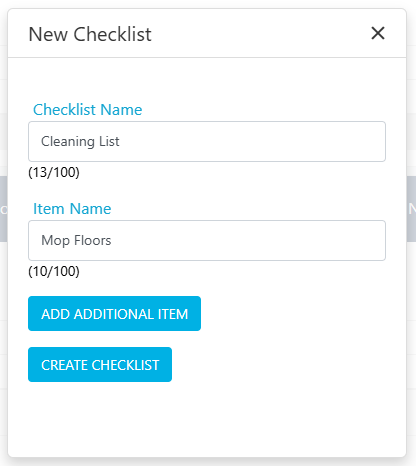 Use the **Add** and **Edit** buttons after creating the checklist to make further adjustments.
 ## Adding a checklist to a shift
When rostering a shift for the client, select the relevant checklist from the drop-down menu.
## Adding a checklist to a shift
When rostering a shift for the client, select the relevant checklist from the drop-down menu.
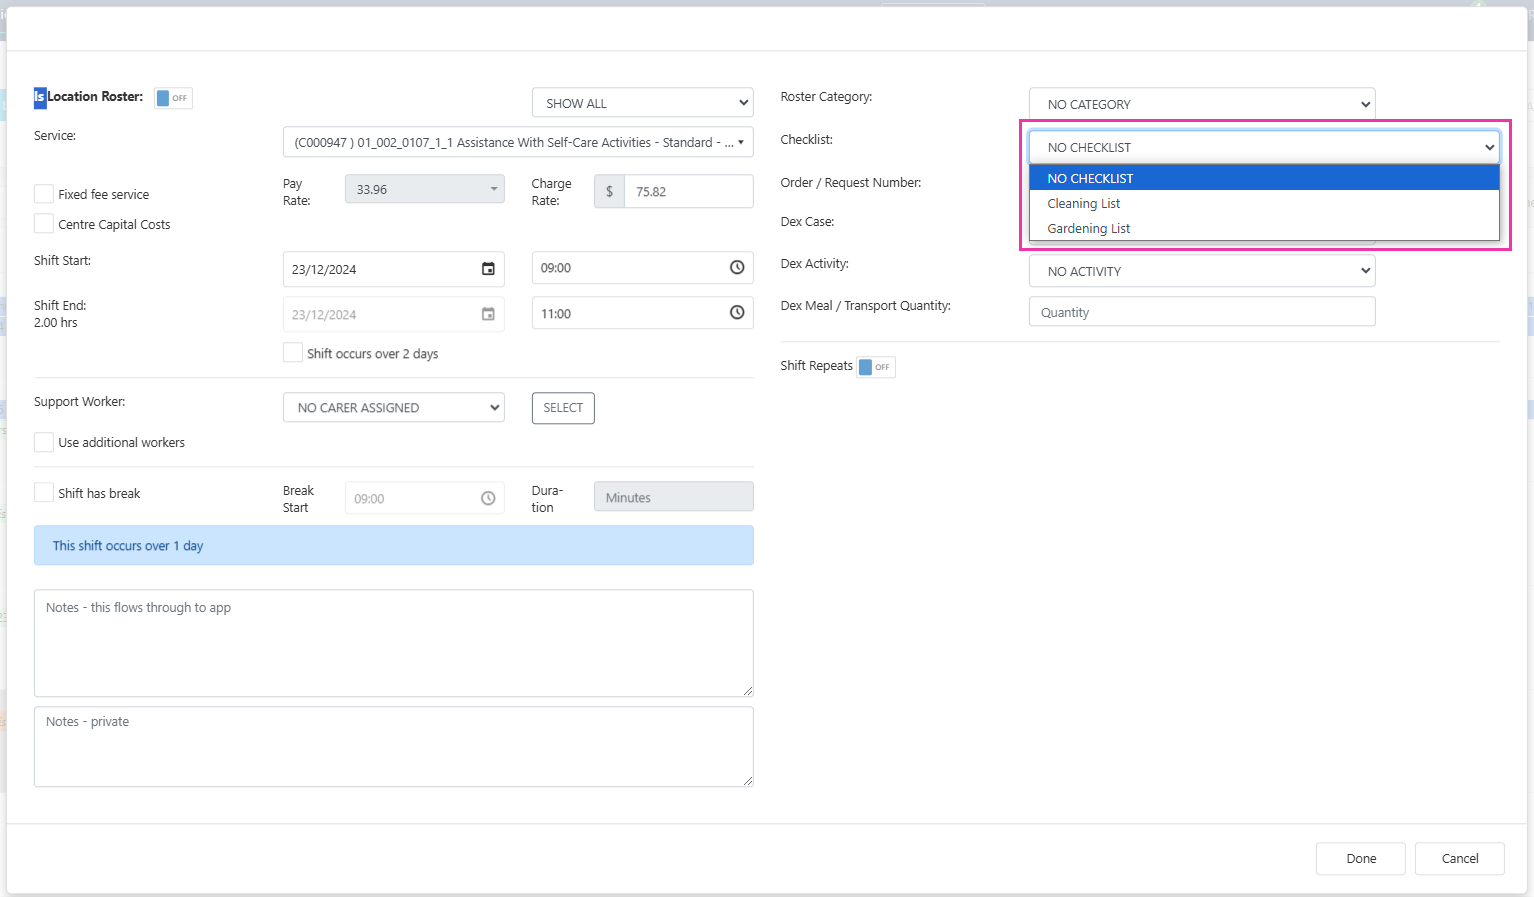 For Location Rosters, roster the shift first, then click **Edit** on the client's roster item to add the checklist. This differs from the standard client roster flow where you select the checklist during rostering.
## Completing a checklist in Vworker
If a checklist has been added to a shift, it appears on the shift home screen in the Vworker app.
For Location Rosters, roster the shift first, then click **Edit** on the client's roster item to add the checklist. This differs from the standard client roster flow where you select the checklist during rostering.
## Completing a checklist in Vworker
If a checklist has been added to a shift, it appears on the shift home screen in the Vworker app.
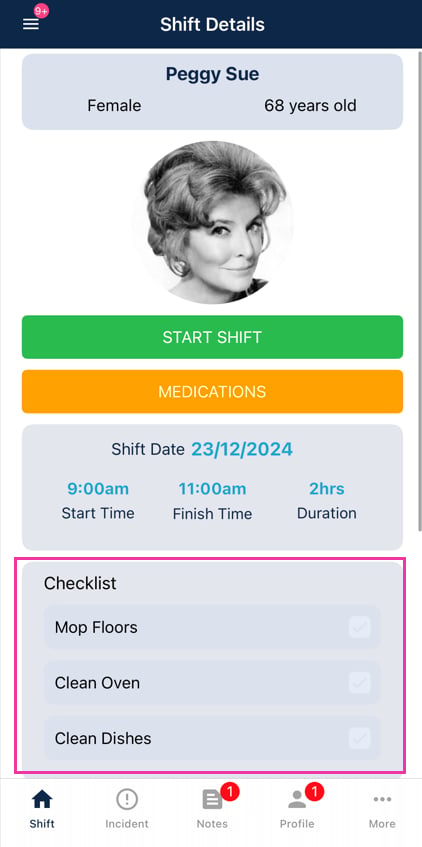 To mark items as complete, the worker opens the checklist, ticks **Completed** for each item, and clicks **Save**.
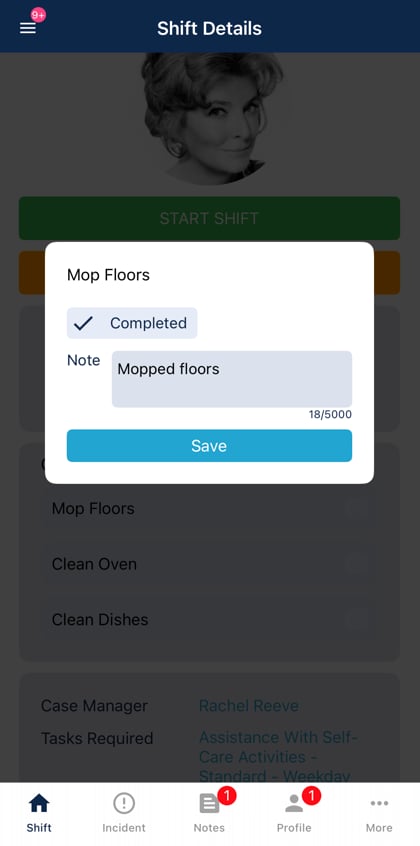 Completing the checklist is not mandatory for the worker to finish their shift. Workers can complete the shift in Vworker without ticking off all checklist items. Use the checklist note report (below) to track whether items were completed.
## Checklist note report
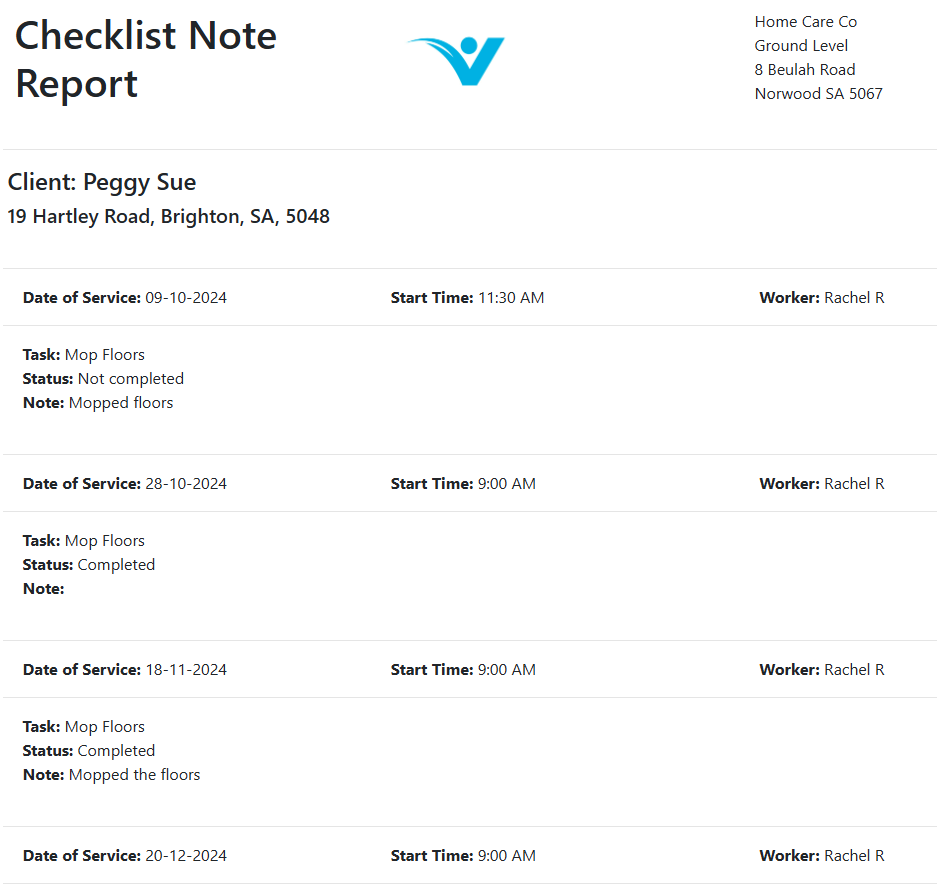
Run a checklist note report to see all completed checklists and any notes workers have added.
In the client profile, go to the **Checklist** tab and click **Checklist Note Report**.
Completing the checklist is not mandatory for the worker to finish their shift. Workers can complete the shift in Vworker without ticking off all checklist items. Use the checklist note report (below) to track whether items were completed.
## Checklist note report
Run a checklist note report to see all completed checklists and any notes workers have added.
In the client profile, go to the **Checklist** tab and click **Checklist Note Report**.

 ## Running into issues?
See [Client management troubleshooting](/troubleshooting/general) for common errors and fixes.
## Related articles
Manage notes and follow-up tasks on client profiles
Set up the client profile that holds checklists
## Running into issues?
See [Client management troubleshooting](/troubleshooting/general) for common errors and fixes.
## Related articles
Manage notes and follow-up tasks on client profiles
Set up the client profile that holds checklists