> ## Documentation Index
> Fetch the complete documentation index at: https://support.visualcare.com.au/llms.txt
> Use this file to discover all available pages before exploring further.
# Worker compliance registers
> Set up, manage, and track worker and client compliance items in Visualcare
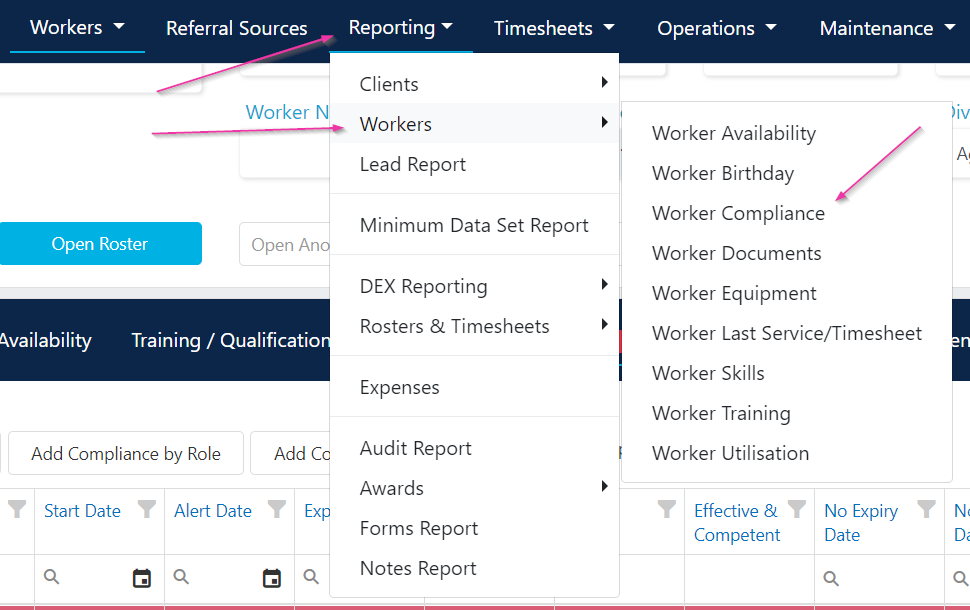
Compliance registers in Visualcare track mandatory items like qualifications, clearances, and certifications for your workers and clients. Items flow automatically from your organisation's compliance configuration in Maintenance, and the home dashboard KPIs flag anything that's expired or approaching its alert date.
## Worker compliance
### Viewing worker compliance
Open a worker's profile and go to the **Compliance** tab. Compliance items that apply to the worker appear here, with start dates, alert dates, and expiry dates.
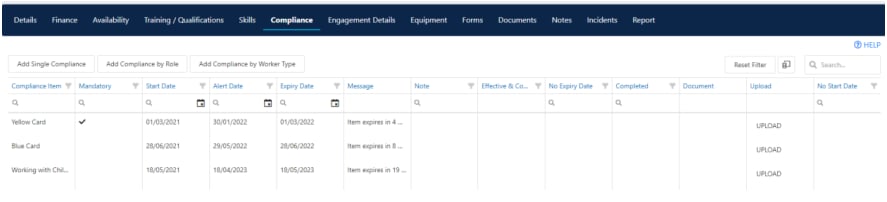 If you edit the start date on a compliance item, the alert and expiry dates flow through automatically. These dates can be overwritten if needed. Items marked as required are mandatory and need to be completed.
### Linking compliance items to roles
You can link compliance items to specific worker roles so that only workers assigned to those roles see the relevant items.
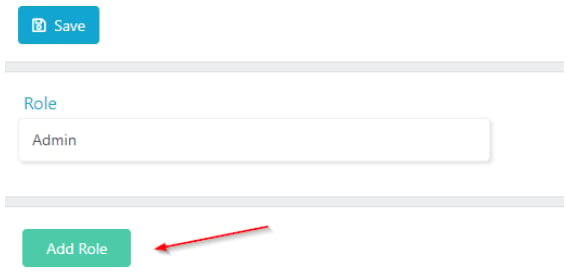
Go to **Maintenance** → **Worker** → **Worker Roles** and click **Add Role** to create the roles your organisation uses.
If you edit the start date on a compliance item, the alert and expiry dates flow through automatically. These dates can be overwritten if needed. Items marked as required are mandatory and need to be completed.
### Linking compliance items to roles
You can link compliance items to specific worker roles so that only workers assigned to those roles see the relevant items.
Go to **Maintenance** → **Worker** → **Worker Roles** and click **Add Role** to create the roles your organisation uses.
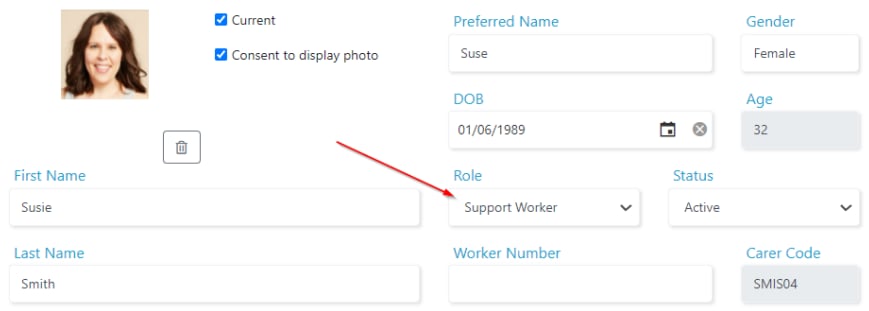
 Open each worker's profile and select the appropriate role.
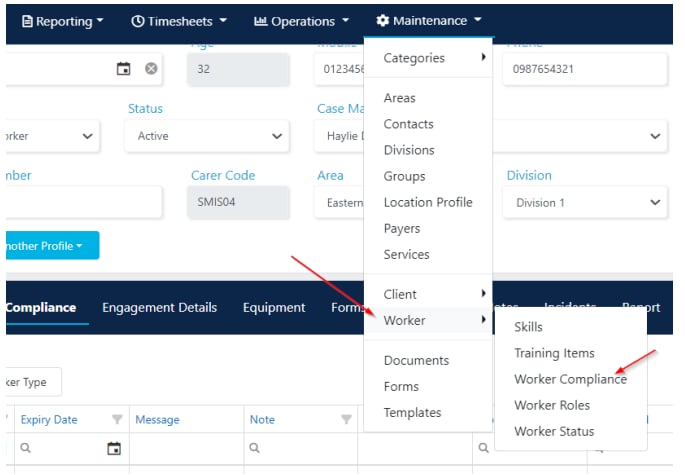
 Go to **Maintenance** → **Worker** → **Worker Compliance**. Select a compliance item and click **Role Link**. Choose the roles that need this item. You can select multiple roles.
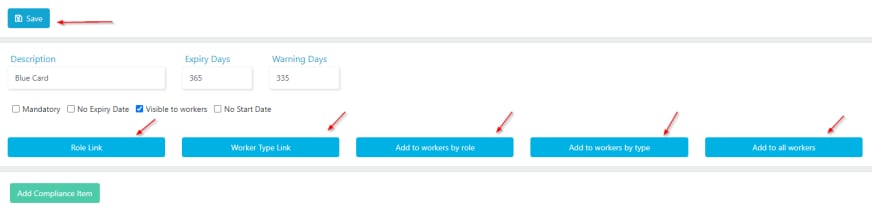 After linking, choose how to distribute the item:
* **Add to workers by role** adds the item to all workers with the selected roles
* **Add to all workers** adds the item to every worker regardless of role
After linking, choose how to distribute the item:
* **Add to workers by role** adds the item to all workers with the selected roles
* **Add to all workers** adds the item to every worker regardless of role
 ### Linking compliance items to worker types
Similar to role linking, you can link compliance items to worker types. Select a compliance item, click **Worker Type Link**, and choose which worker types need the item. Then use **Add to workers by type** to distribute it.
### Compliance and rostering
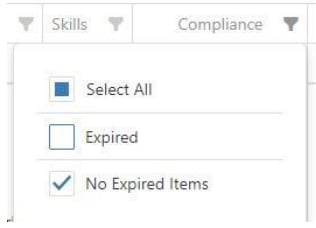
When you use the **Worker Select** button on the roster to choose a worker for a shift, Visualcare highlights workers who are compliant. By default, only workers with no expired items are shown. To include workers with expired items, select the **Expired** filter.
### Linking compliance items to worker types
Similar to role linking, you can link compliance items to worker types. Select a compliance item, click **Worker Type Link**, and choose which worker types need the item. Then use **Add to workers by type** to distribute it.
### Compliance and rostering
When you use the **Worker Select** button on the roster to choose a worker for a shift, Visualcare highlights workers who are compliant. By default, only workers with no expired items are shown. To include workers with expired items, select the **Expired** filter.
 ### Forms compliance
Completed forms can be linked to compliance items. You can view linked forms under the **Compliance** tab on the worker's profile. Click **View** to open the form or **Unlink** to remove the association.
### Forms compliance
Completed forms can be linked to compliance items. You can view linked forms under the **Compliance** tab on the worker's profile. Click **View** to open the form or **Unlink** to remove the association.
 ## Client compliance
Client compliance items work in a similar way to worker compliance but are configured separately.
### Setting up client compliance items
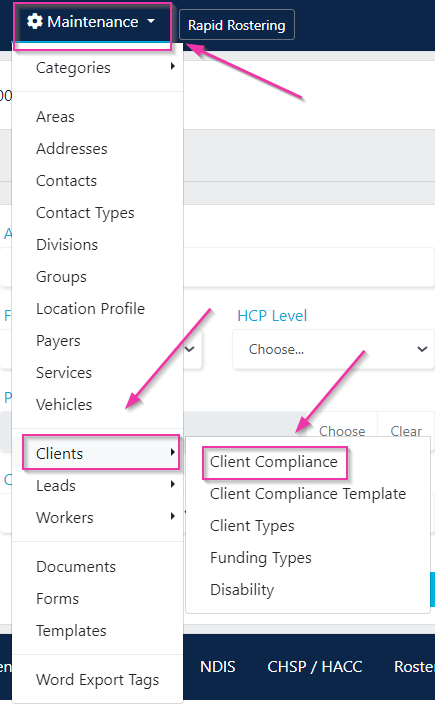
Go to **Maintenance** → **Client** → **Client Compliance**.
## Client compliance
Client compliance items work in a similar way to worker compliance but are configured separately.
### Setting up client compliance items
Go to **Maintenance** → **Client** → **Client Compliance**.
 Click **Add Compliance Item** to create a new item. Enter the description, expiry days, warning days, and whether the item is mandatory. Click **Save**.
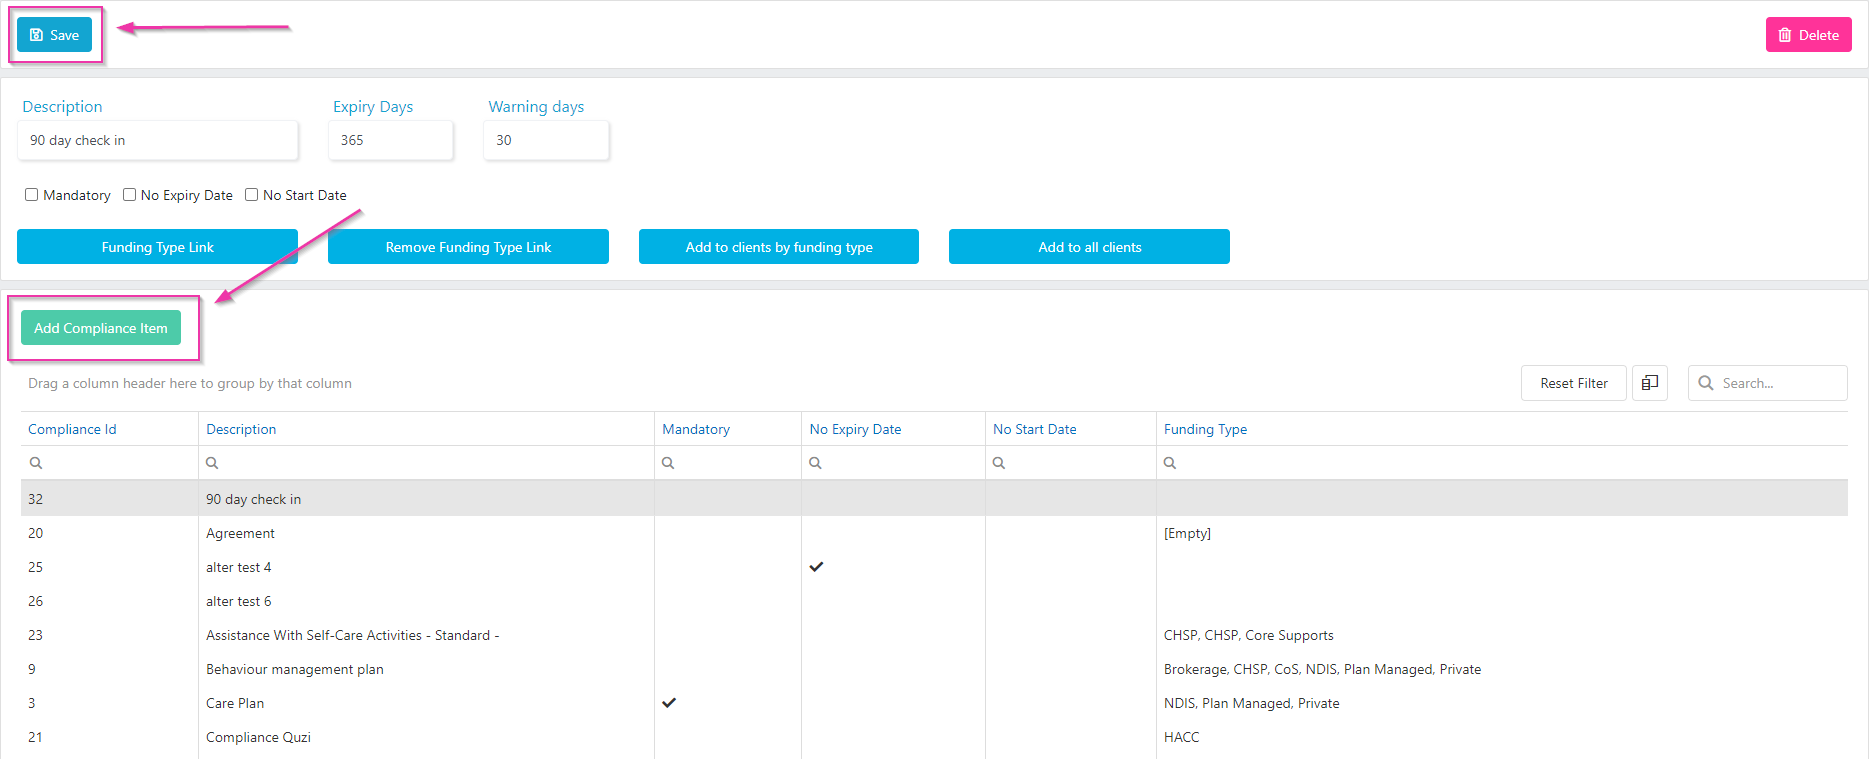 Compliance items can be linked to a specific funding type, so only clients with that funding type see the relevant items.
### Viewing client compliance
Open the client's profile and go to the **Compliance** tab to view and edit compliance items.
Compliance items can be linked to a specific funding type, so only clients with that funding type see the relevant items.
### Viewing client compliance
Open the client's profile and go to the **Compliance** tab to view and edit compliance items.
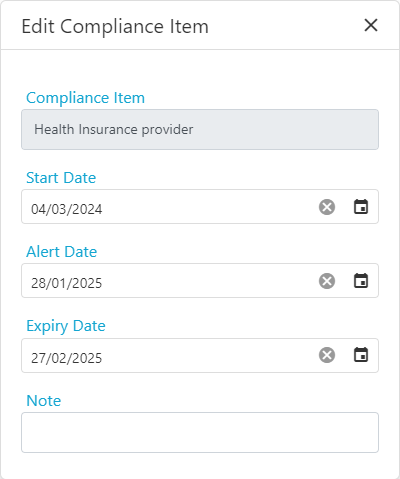
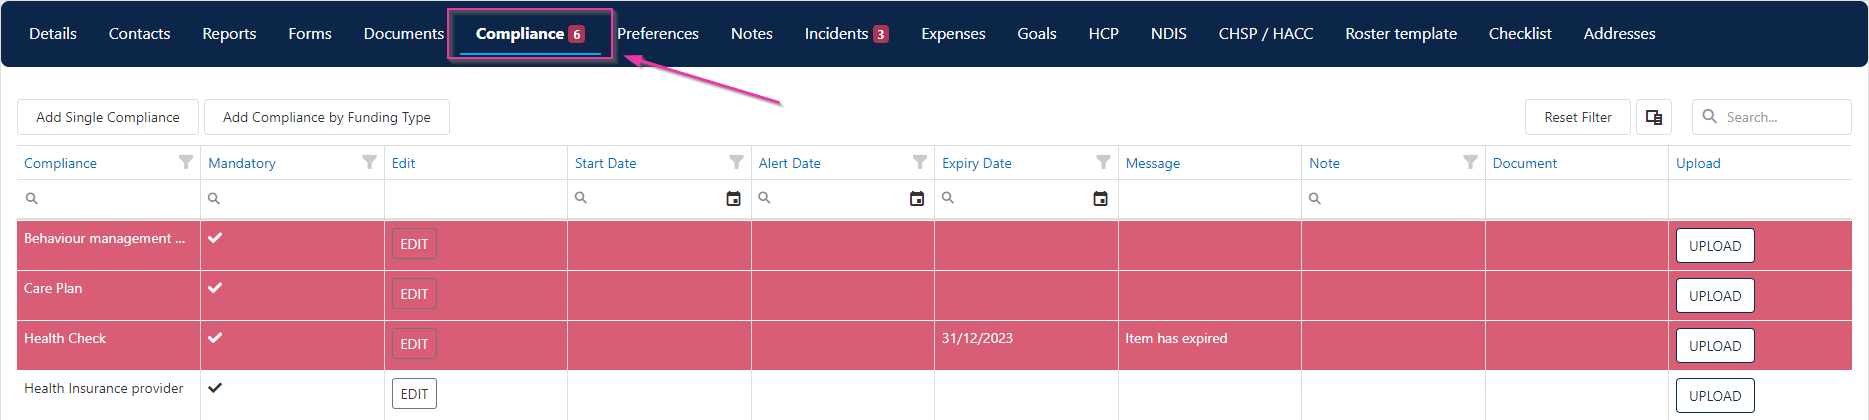 Click **Edit** on any item to update its details.
 ## Dashboard compliance KPIs
The home dashboard includes **Worker Compliance** and **Client Compliance** KPI tiles that show the number of expired compliance items across your organisation.
## Dashboard compliance KPIs
The home dashboard includes **Worker Compliance** and **Client Compliance** KPI tiles that show the number of expired compliance items across your organisation.
 Click a KPI tile to see the detail and filter by items that have reached their alert date or are already expired.
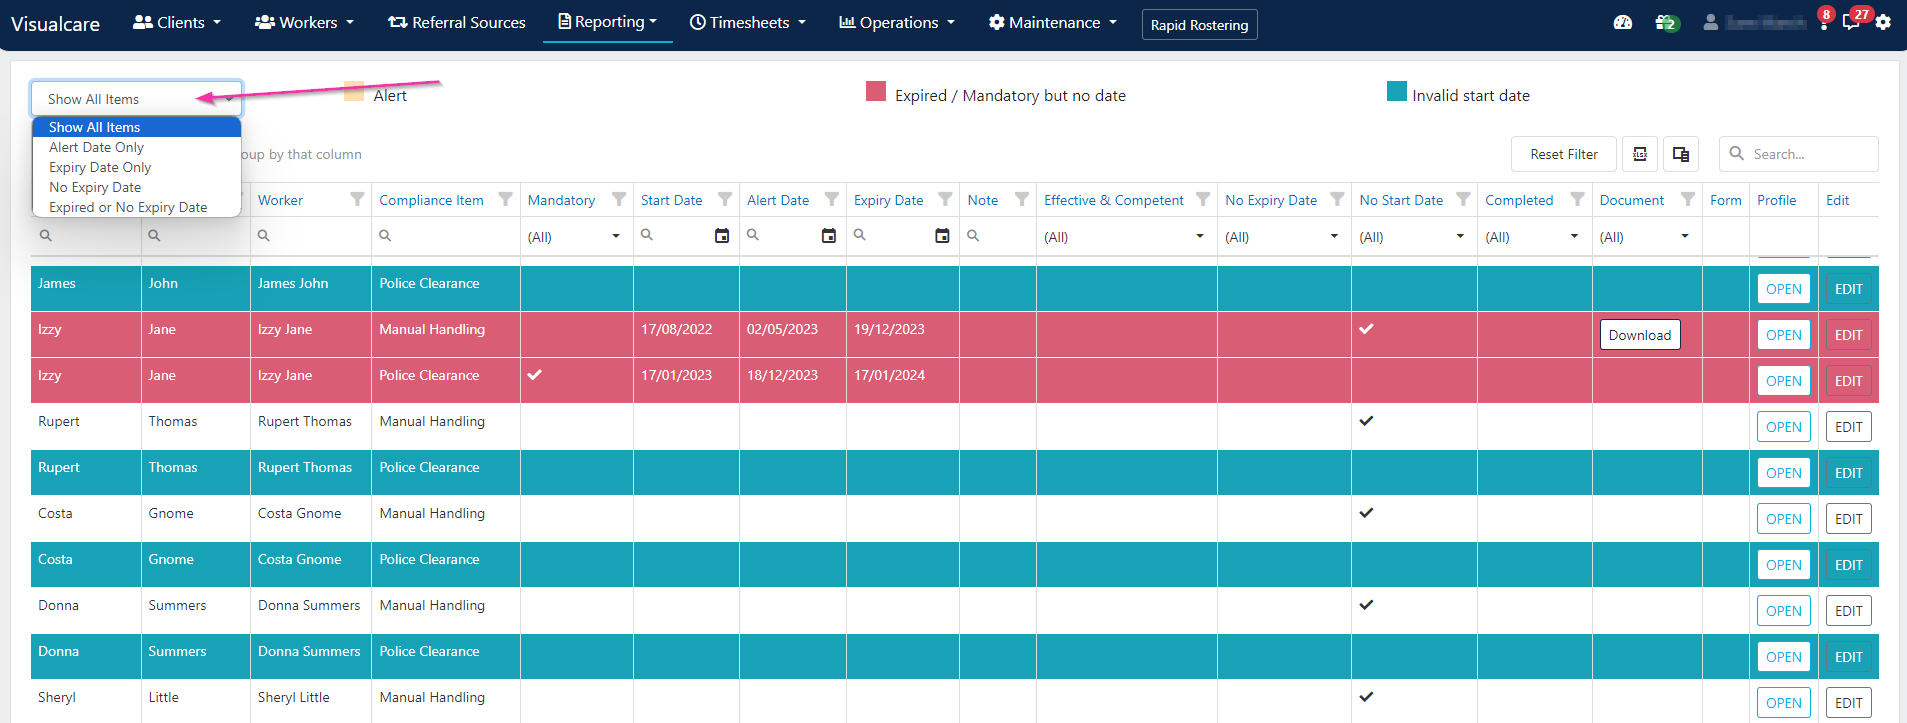 Check the compliance KPI tiles regularly to stay on top of expiring items. Addressing items before they expire avoids gaps that could affect rostering or audit readiness.
## Running into issues?
See [General troubleshooting](/troubleshooting/general) for common errors and fixes.
## Related articles
Set up and manage compliance items at the organisational level
Compliance and training reports for your workforce
Day-to-day management of individual worker compliance
Audit reports and required compliance for clients
Check the compliance KPI tiles regularly to stay on top of expiring items. Addressing items before they expire avoids gaps that could affect rostering or audit readiness.
## Running into issues?
See [General troubleshooting](/troubleshooting/general) for common errors and fixes.
## Related articles
Set up and manage compliance items at the organisational level
Compliance and training reports for your workforce
Day-to-day management of individual worker compliance
Audit reports and required compliance for clients