> ## Documentation Index
> Fetch the complete documentation index at: https://support.visualcare.com.au/llms.txt
> Use this file to discover all available pages before exploring further.
# Rapid rostering
> How to use roster templates to quickly create shifts for a client
Roster templates let you define standard shift patterns for a client, then generate multiple shifts at once from those templates. This speeds up rostering for clients with regular, predictable schedules.
## Creating roster templates
Go to the client profile and click the **Roster Template** tab. You can double-click an existing template to edit it, or click **New Roster Item** to create a new one.
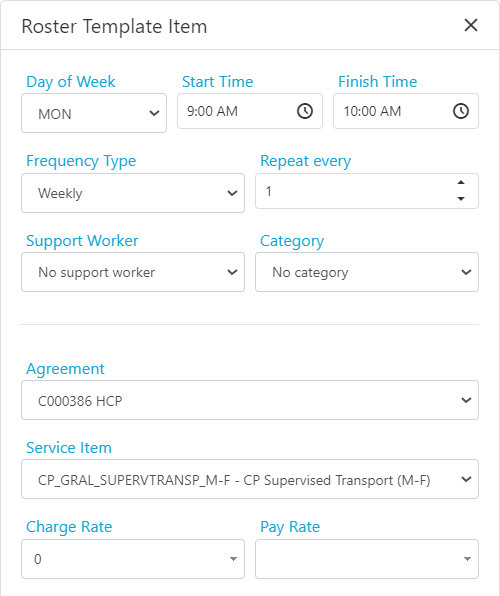
 In the new roster item window, set up the shift pattern:
| Field | Description |
| -------------------------- | --------------------------------------- |
| **Day of week** | Which day the shift falls on |
| **Start time** | Shift start time |
| **Finish time** | Shift finish time |
| **Frequency** | Weekly or monthly |
| **Repeats** | How often the shift repeats |
| **Default support worker** | Assign a worker or leave as unallocated |
| **Category** | Shift category |
| **Agreement** | Linked agreement |
| **Service** | Service code for the shift |
Once saved, the template item appears in the list.
In the new roster item window, set up the shift pattern:
| Field | Description |
| -------------------------- | --------------------------------------- |
| **Day of week** | Which day the shift falls on |
| **Start time** | Shift start time |
| **Finish time** | Shift finish time |
| **Frequency** | Weekly or monthly |
| **Repeats** | How often the shift repeats |
| **Default support worker** | Assign a worker or leave as unallocated |
| **Category** | Shift category |
| **Agreement** | Linked agreement |
| **Service** | Service code for the shift |
Once saved, the template item appears in the list.
 ## Generating shifts from templates
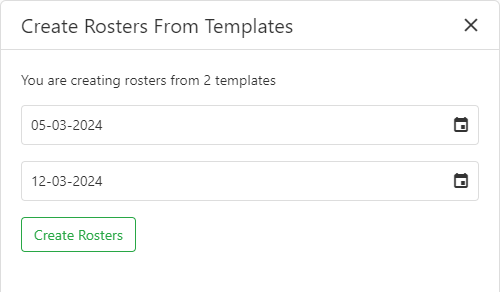
In the roster templates list, tick the templates you want to use and click **Create Rosters**.
## Generating shifts from templates
In the roster templates list, tick the templates you want to use and click **Create Rosters**.
 Enter the start and end dates for the period you want to create shifts for.
 A list of all shifts appears in date order. From here you can make specific changes such as:
* Changing the worker for a particular day
* Adjusting times or services
* Deleting a shift if the client is away on a specific date
A list of all shifts appears in date order. From here you can make specific changes such as:
* Changing the worker for a particular day
* Adjusting times or services
* Deleting a shift if the client is away on a specific date
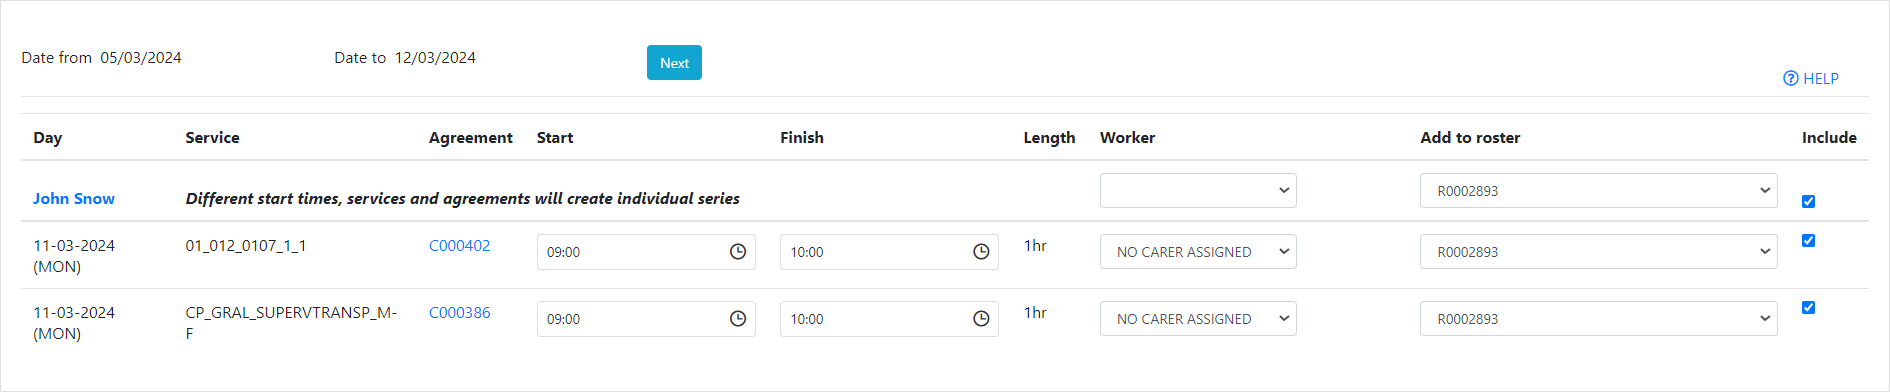 Click **Next** to review the final list, then confirm to create the shifts in the client roster.
For bulk creation of shifts across multiple clients using roster templates, see [Roster template wizard](/scheduling/roster-template-wizard).
## Running into issues?
See [Scheduling troubleshooting](/troubleshooting/rostering-issues) for common errors and fixes.
## Related articles
Create rosters in bulk for multiple clients at once
Create shifts manually in a client roster
Set up repeating shift patterns
Click **Next** to review the final list, then confirm to create the shifts in the client roster.
For bulk creation of shifts across multiple clients using roster templates, see [Roster template wizard](/scheduling/roster-template-wizard).
## Running into issues?
See [Scheduling troubleshooting](/troubleshooting/rostering-issues) for common errors and fixes.
## Related articles
Create rosters in bulk for multiple clients at once
Create shifts manually in a client roster
Set up repeating shift patterns