
Creating roster templates
1
Open roster templates
Go to the client profile and click the Roster Template tab. You can double-click an existing template to edit it, or click New Roster Item to create a new one.
2
Define the template
In the new roster item window, set up the shift pattern: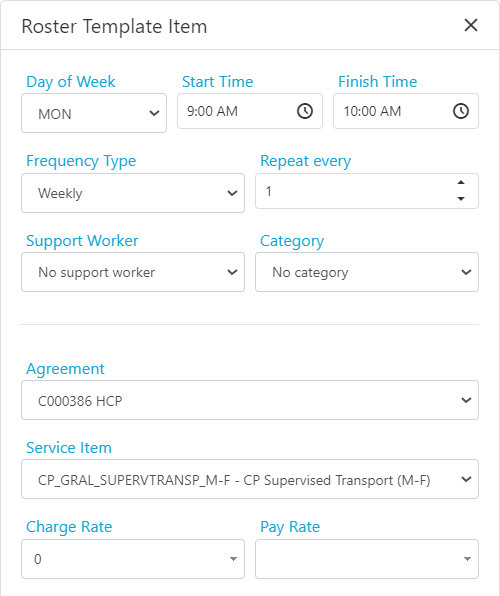
Once saved, the template item appears in the list.
Generating shifts from templates
1
Select templates
In the roster templates list, tick the templates you want to use and click Create Rosters.
2
Set the date range
Enter the start and end dates for the period you want to create shifts for.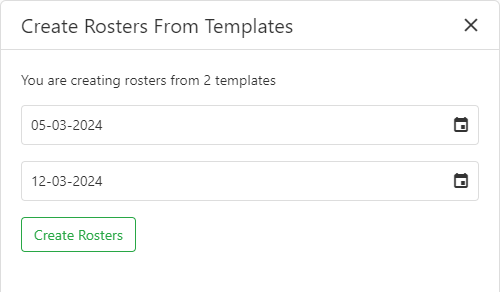
3
Review and adjust
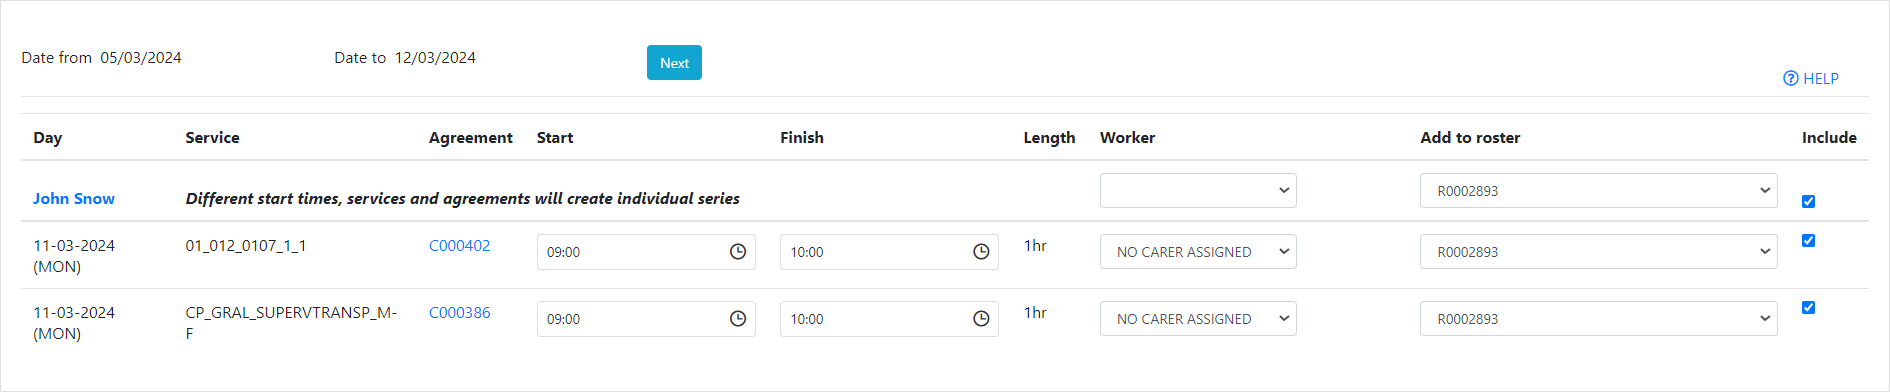
A list of all shifts appears in date order. From here you can make specific changes such as:
- Changing the worker for a particular day
- Adjusting times or services
-
Deleting a shift if the client is away on a specific date
4
Confirm
Click Next to review the final list, then confirm to create the shifts in the client roster.
Running into issues?
See Scheduling troubleshooting for common errors and fixes.Related articles
Roster template wizard
Create rosters in bulk for multiple clients at once
Creating new shifts
Create shifts manually in a client roster
Creating recurring shifts
Set up repeating shift patterns