
What you’ll need
- A client profile with at least a first name and last name
- An active agreement with a start date, end date, and at least one service
Setting up a new client roster
1
Open client rosters
Go to Client Rosters and click Create New Roster. This step is only needed once per client - if a roster already exists, skip ahead to creating a shift.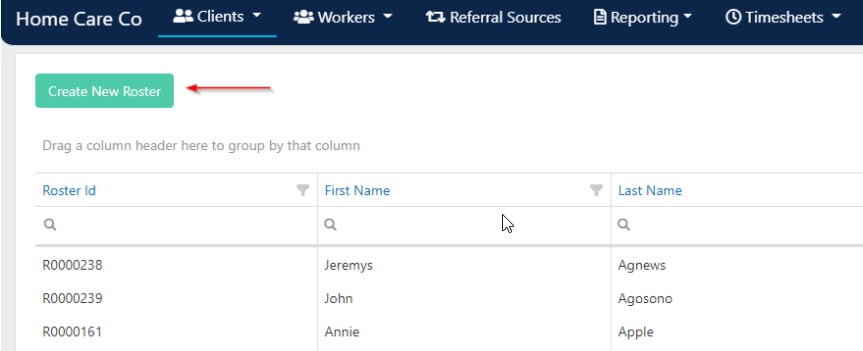
2
Search for the client
Use the search filters to find the client you want to roster for.
3
Start rostering
Once the client is selected, a blank roster opens where you can begin adding shifts.
Creating a shift
1
Open the shift form
Double-click on the day you want the shift to start on. The roster screen opens.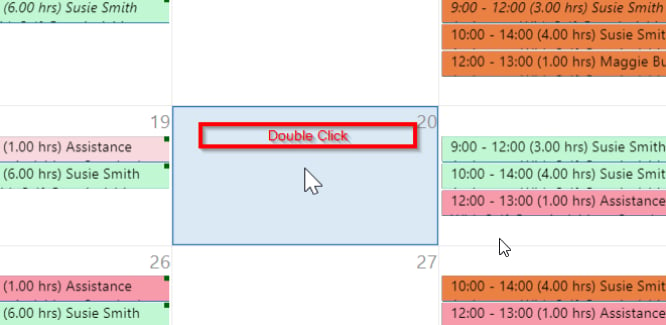
2
Fill in shift details
Complete the following fields: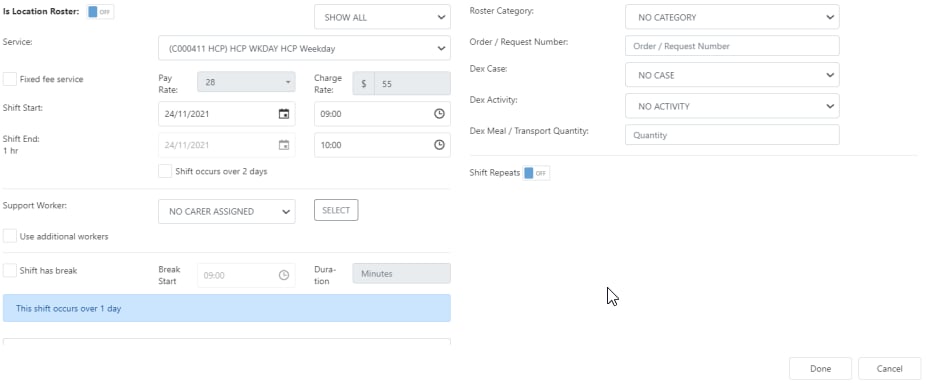
3
Save the shift
Once all details are entered, click Done. The shift appears on the roster and is sent to the assigned worker via the vWorker mobile app.
Fixed fee shifts
Fixed fee shifts let you charge a fixed amount for the entire shift regardless of duration.1
Set up the shift first
Open a client roster, enter a shift, and select the time and worker first.
2
Enable fixed fee
Click Fixed Fee and enter the charge rate for the fixed amount.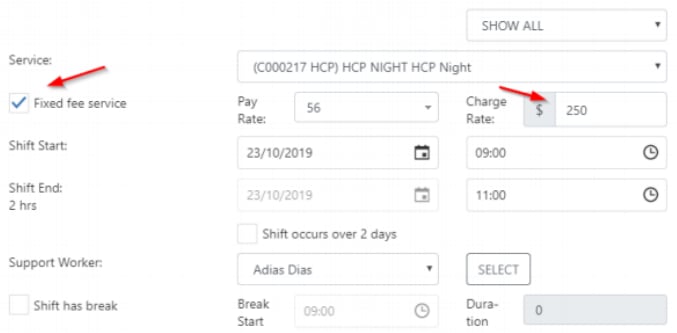
3
Review in timesheets
The fixed fee flows through to timesheets and appears in the Charge Rate column. You can add the Is Fixed Fee column in timesheets from the column chooser to easily identify which shifts have fixed fees.
Cancelling a shift
To cancel a shift without deleting it from the roster, right-click the shift and select Mark This Shift as On Leave. Then fill in the following fields:
Click Save. The shift changes to the cancelled colour on the roster.
Roster tools
The top of the roster contains several tools for managing the roster as a whole:Running into issues?
See Scheduling troubleshooting for common errors and fixes.Related articles
Creating recurring shifts
Set up repeating shift patterns and split shifts
Worker select button
Use the select button to filter and find the right worker
Editing shifts
Edit one-off shifts, series, and manage leave
Budget information while rostering
View client budget information while rostering