
Roster navigation
The client roster screen includes several quick-access features at the top of the page.Hyperlinks
Click on the hyperlinks at the top of the roster screen to quickly access related information:- Client Name - opens the client profile page
- Address - shows the location on Google Maps
- Email - opens a new email to the client

Toolbar
The toolbar provides access to budget, notes, leave, deleted shifts, and roster history.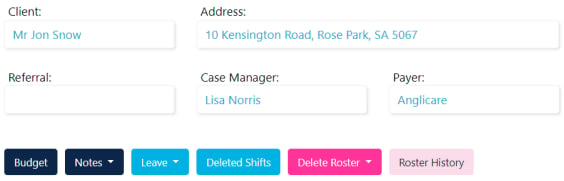
Publish toggle
- Publish ON - workers see their shifts and get notifications as shifts are updated, added, or deleted
- Publish OFF - workers don’t see any shifts on their phone. Make changes without triggering notifications
Complete a roster
When a roster is finished (for example, the client has ceased services), click Complete. Then filter out completed rosters in your roster list.
Editing a recurring roster
Right-click on a recurring roster item to see the available options: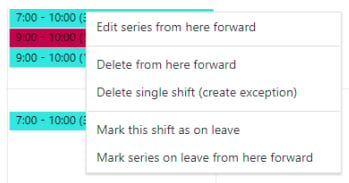
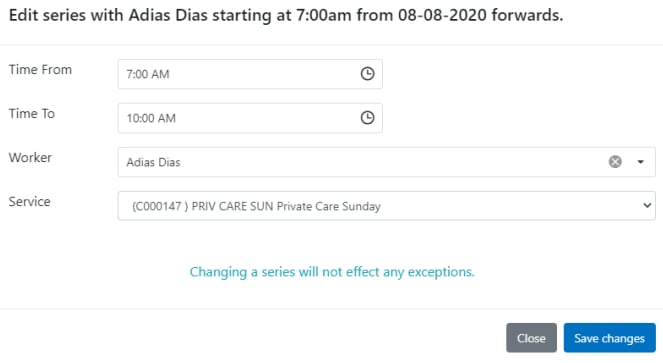
Editing a one-off or single item in a series
Double-click on the item and change the details. A message at the top of the screen confirms you’re editing a single roster item.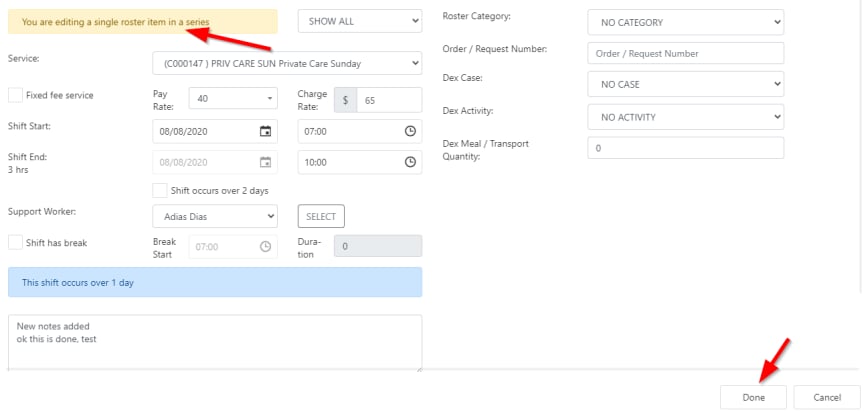
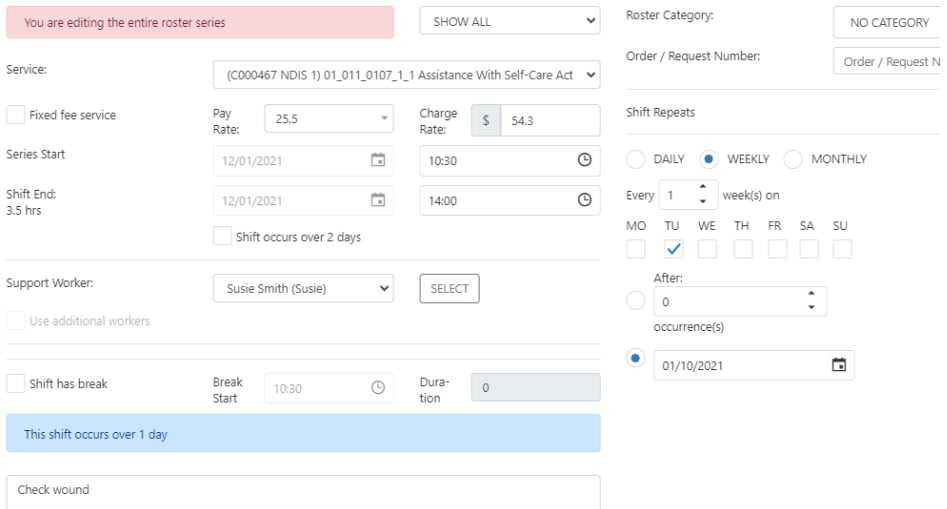
Editing an entire series
Left-click on one of the roster items in the series and select Edit Series.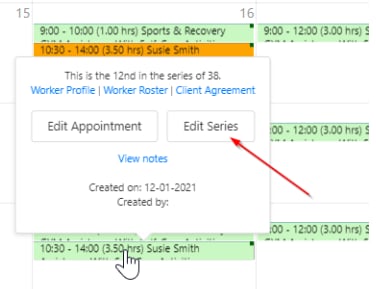
Managing leave and cancellations
To enter leave or a cancellation for a client, select the Leave button at the top left of the roster. Select a date range or multiple individual items at once. Alternatively, right-click on a shift or series to add leave directly.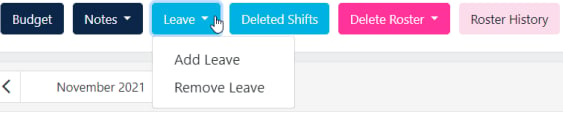
1
Select shifts
Select the date range to highlight tick boxes, or select items individually, then click Next.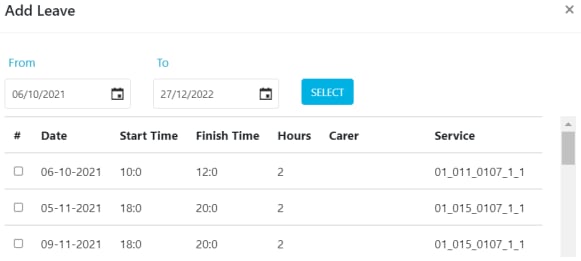
2
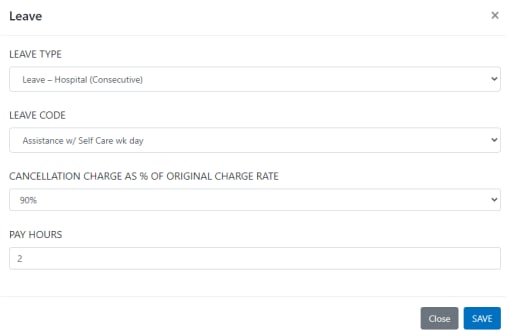
Configure leave settings
Select the type of leave or cancellation and configure the relevant charge and pay settings, then click Save.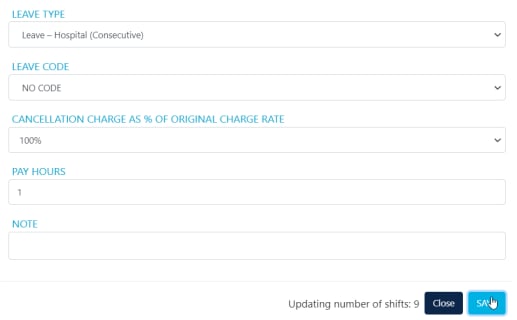
3
Review leave
Right-click on a shift to see the leave type and to remove leave from the shift or series if needed.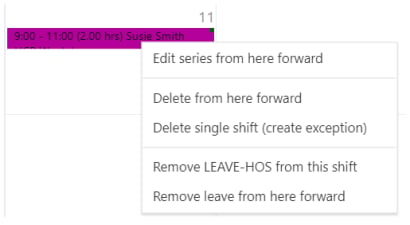
Leave charge and pay options
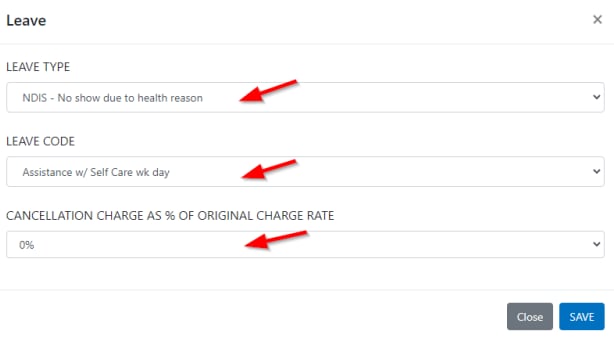
No charge client, pay worker
No charge client, pay worker
The client is not charged but the worker is paid.
- Select Leave Type and Leave Code
- Reduce Cancellation Charge % to 0%
-
Leave Pay Hours as is (defaults to full shift pay hours, or enter reduced hours as per your policies)
No charge client, no pay worker
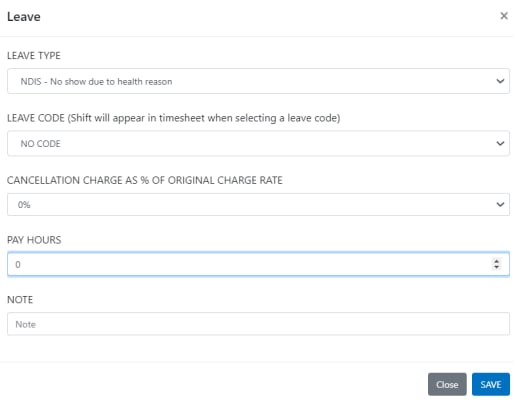
No charge client, no pay worker
Neither the client nor the worker is paid.
-
Set Leave Code to No Code to make sure the leave is not sent to timesheets for invoicing or payroll
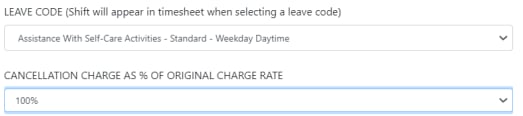
Charge client, pay worker
Charge client, pay worker
Both the client is charged and the worker is paid.
- Select Leave Type and Leave Code
- Set Cancellation Charge % to 100% (or a reduced percentage as per your arrangement)
-
Leave Pay Hours as is (defaults to full shift pay hours, or enter reduced hours as per your policies)
Charge client, no pay worker
Charge client, no pay worker
The client is charged but the worker is not paid.
- Select Leave Code and set Cancellation Charge % to 100% (or a reduced percentage)
-
Update Pay Hours to zero (or enter reduced hours as per your policies)
Roster notes
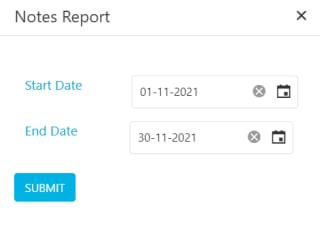
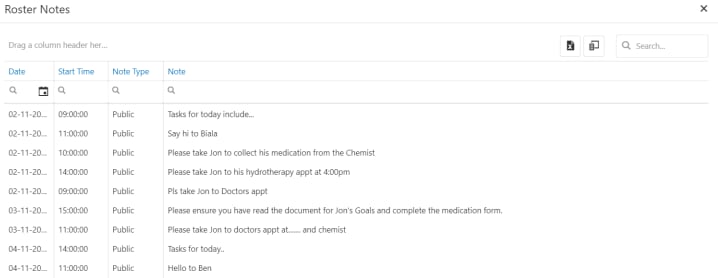
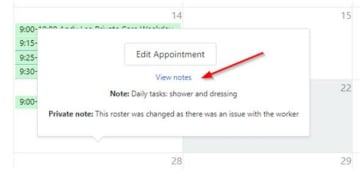
Click the Notes icon in the toolbar to view notes in the roster area.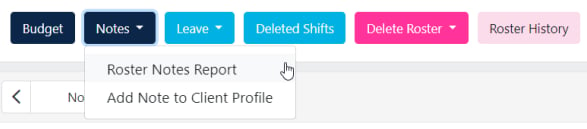
Deleting shifts and rosters
Delete shifts from a date
Select Delete Roster then Delete shifts from date to remove all shifts from a specific date.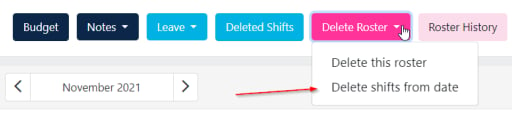
Recover deleted shifts
Go to Deleted Shifts in the top left corner of the roster and select shifts to reinstate.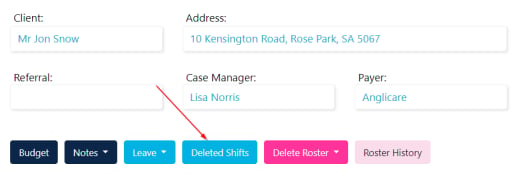
Running into issues?
See Scheduling troubleshooting for common errors and fixes.Related articles
Creating new shifts
Set up a client roster and create individual shifts
Creating recurring shifts
Set up repeating shift patterns and split shifts
Budget information while rostering
View budget details while working in the roster
Conflict management
Identify and resolve shift conflicts